This guide builds a real RKE2 Kubernetes cluster with dPanel, kube-rke, on two servers and serves a web app from it at https://kube-rke.devetek.app. Follow along with your own servers and domain; it takes about 30 minutes, most of it waiting.
RKE2 is Rancher's security-focused Kubernetes: CIS-ready defaults, the Canal network plugin, and its control plane (etcd, API server, scheduler) running as visible pods. It needs bigger servers than k3s and runs on amd64 and arm64 only. For small machines or a Raspberry Pi, see Kubernetes with k3s. New to the words? Read Server groups and clusters first.
Before you start
You need servers that dPanel already manages and that read Ready. This guide uses two:
| Server | Role in the cluster | Size |
|---|---|---|
| kube-rke-1 | Server | 2 CPU, 4 GB, Ubuntu 24.04 |
| kube-rke-2 | Agent | 2 CPU, 4 GB, Ubuntu 24.04 |
- Size: 2 CPU and 4 GB of memory or more per server, amd64 or arm64. RKE2 runs more system pods than k3s; smaller servers struggle.
- System: Ubuntu. This guide was tested on Ubuntu 24.04.
- Same region for every server, not in any group, without Docker, k3s or RKE2, and with the dPanel firewall off.
A fresh server launched from dPanel meets all of this. See Create a cloud server.
1. Start a Kubernetes group
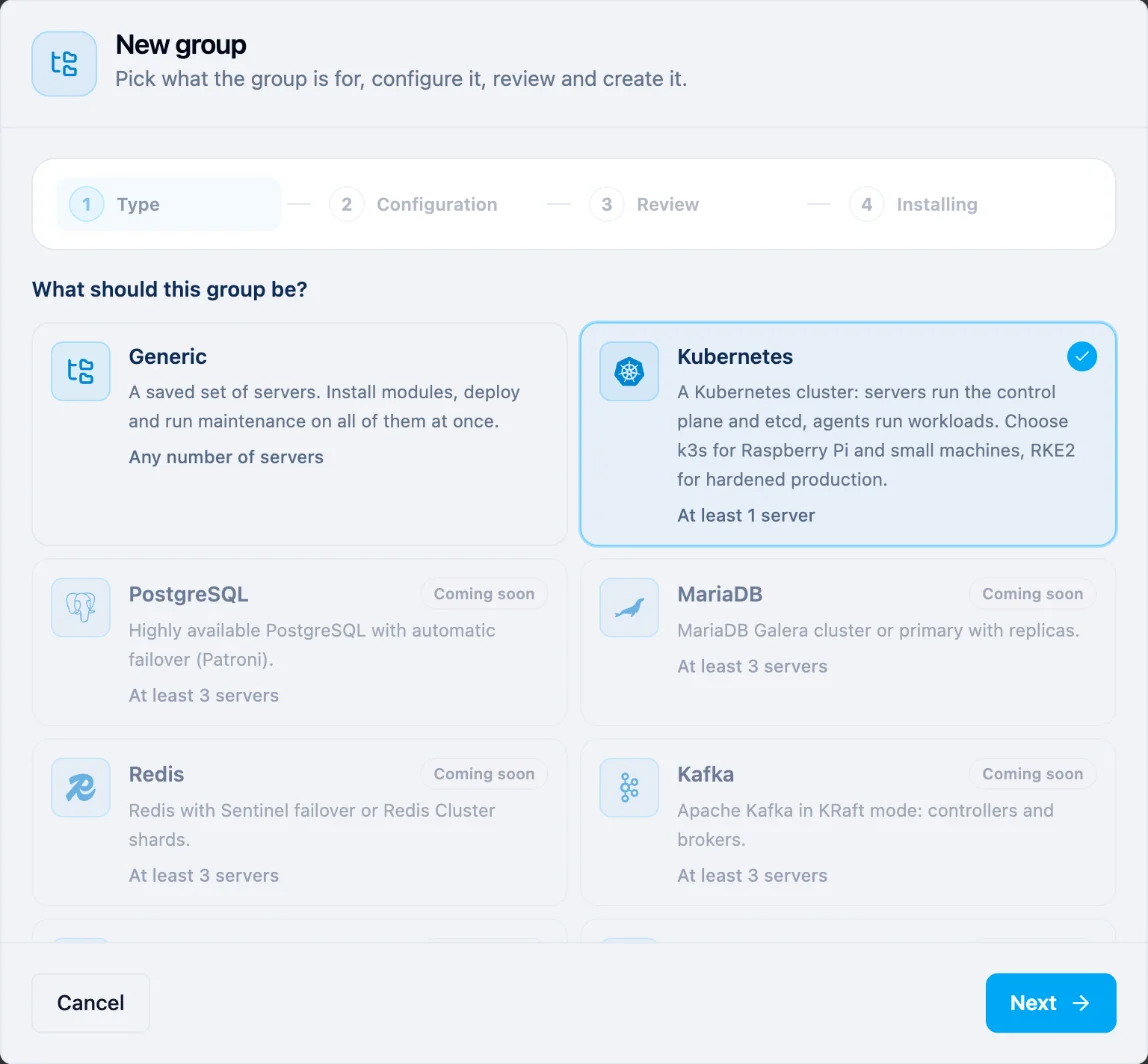
- Open Servers, then Server groups, and press New group.
- Under What should this group be?, choose Kubernetes and press Next.
2. Pick the servers and their roles
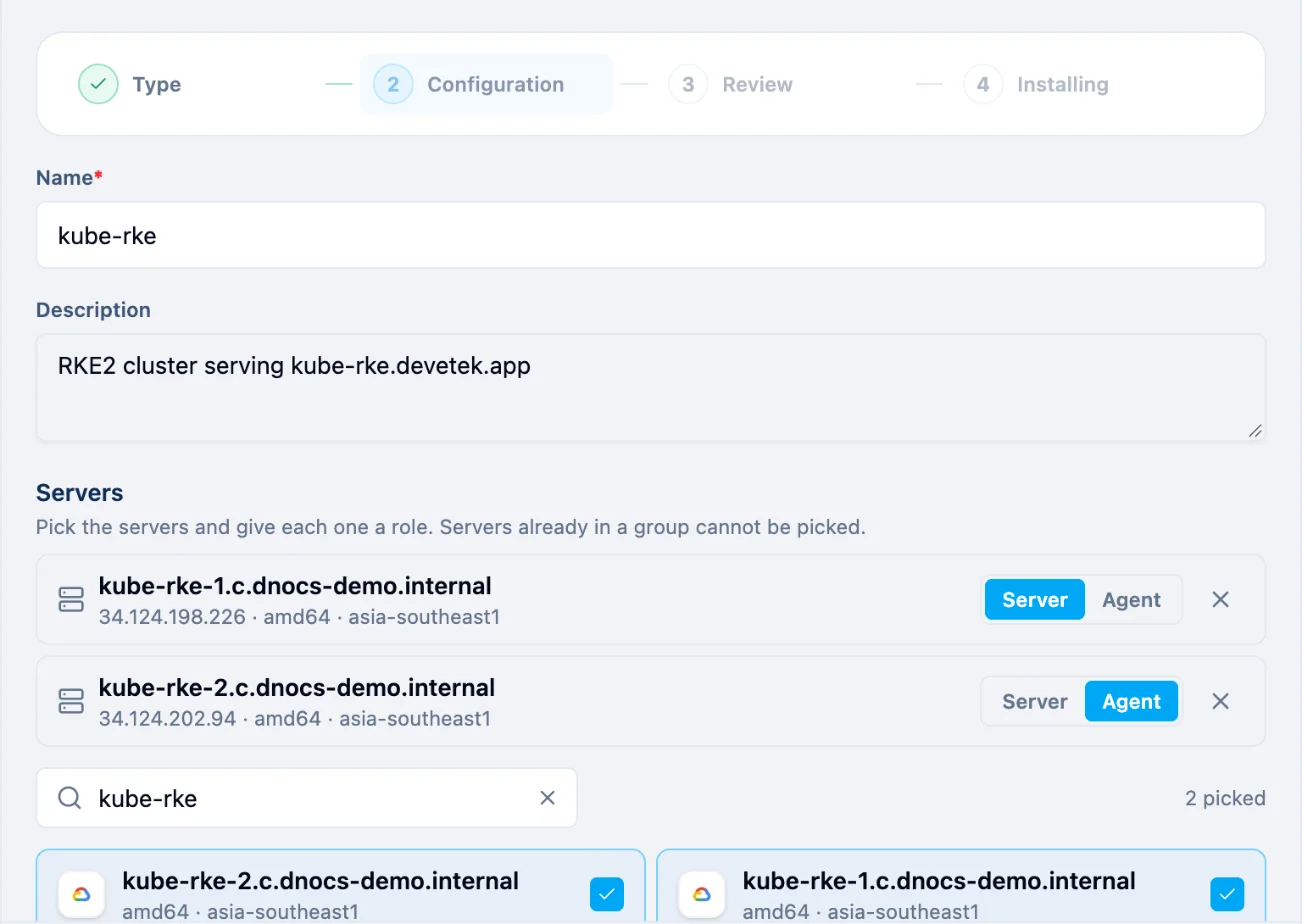
- Name:
kube-rke. Description: anything that helps, for example "RKE2 cluster serving kube-rke.devetek.app". - Under Servers, type
kube-rkein Search servers, then tick kube-rke-1 first and kube-rke-2 second. - Each picked server appears at the top with a role switch. The first one gets Server (the control plane), the others Agent (apps only). Press the other button to change a role.
3. Choose RKE2
Scroll down to Engine:
- Pick RKE2. On amd64 servers with enough memory it is already selected.
- Version: keep the newest,
v1.37.1+rke2r1here. - Built-in ingress: leave it off. dPanel's load balancer brings web traffic in (step 8), and RKE2's ingress-nginx would take ports 80 and 443 away from it.
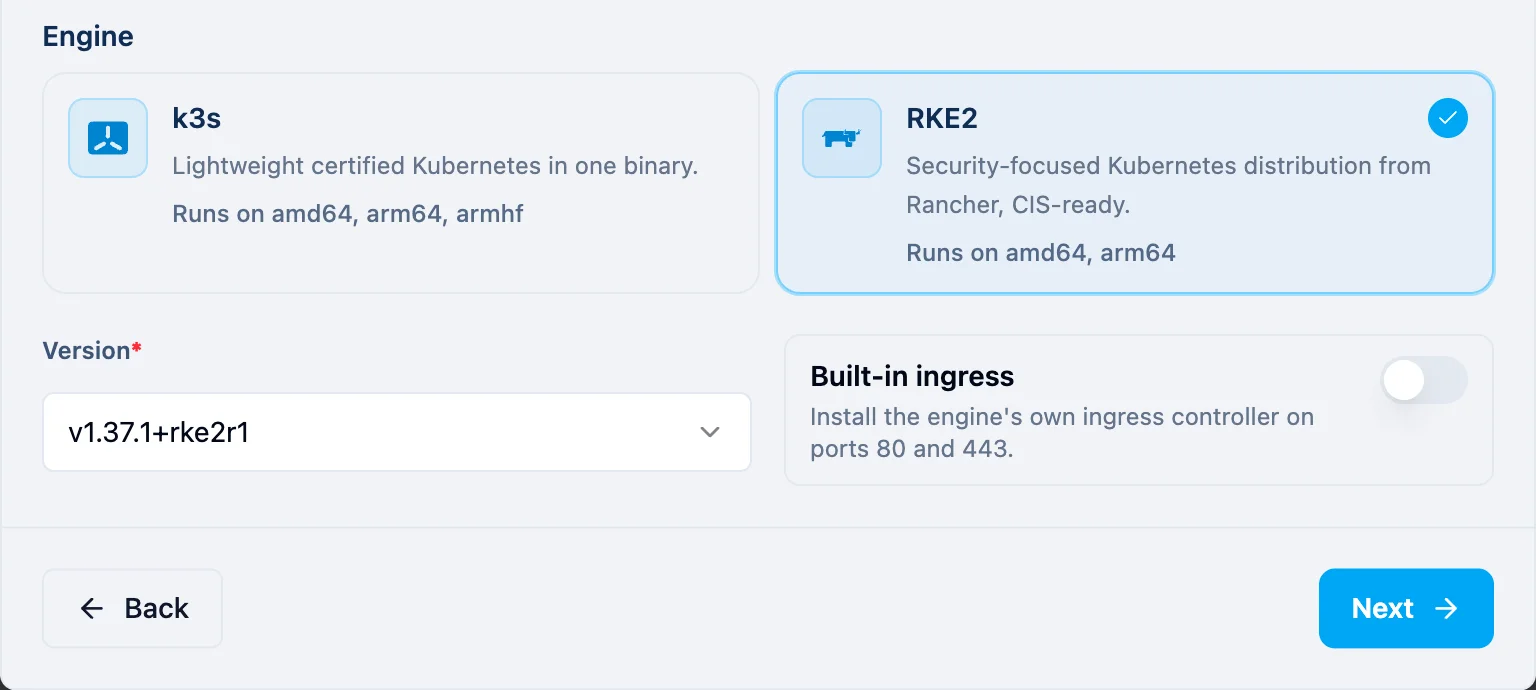
Press Next.
4. Review and install
The Review lists what will be installed where: RKE2 as Server on kube-rke-1 and as Agent on kube-rke-2. Press Create and install.
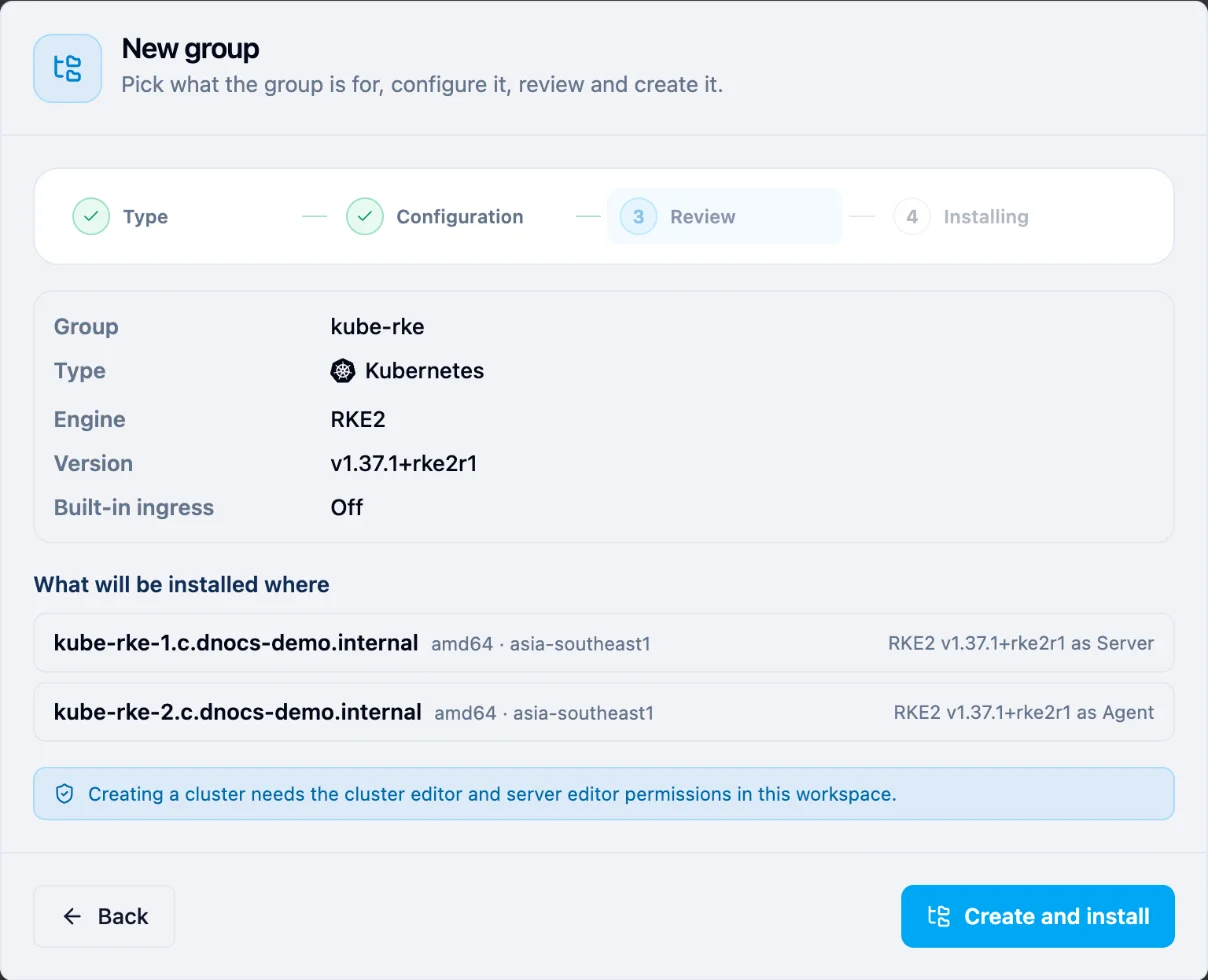
dPanel creates the group and starts one install job over both servers: the server first, then the agent.
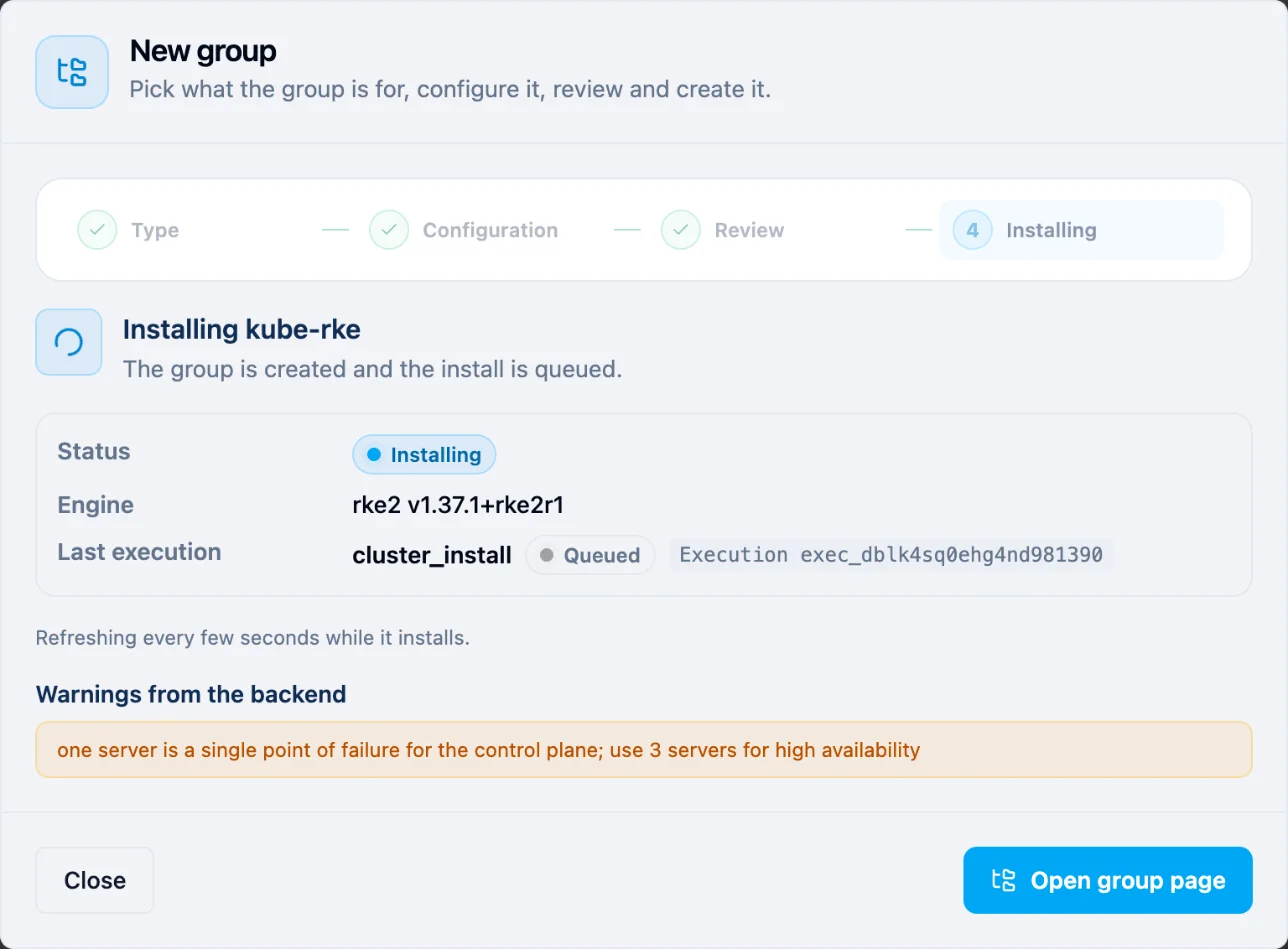
You can close the wizard; the install keeps going. It takes about 12 minutes: RKE2 pulls more images than k3s.
5. Check the cluster
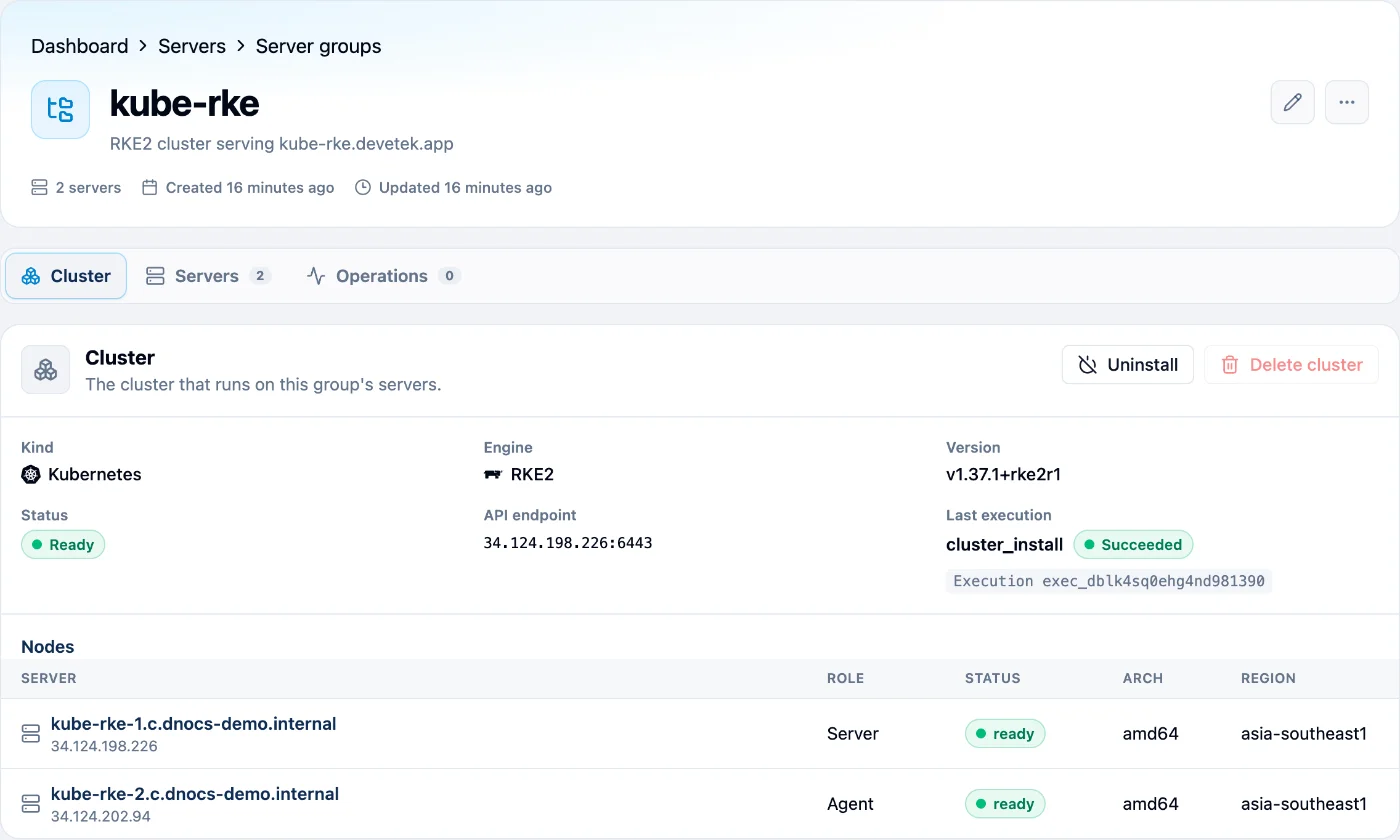
Open the group (Open group page, or select it in Server groups). The Cluster tab shows the engine and version, the API endpoint, the last execution, and every node with its role. When the install is done, the status and both nodes read Ready.
6. Open a terminal on the Server node
You talk to Kubernetes with kubectl, run in a terminal on the node with the Server role. dPanel opens that terminal in your browser; you need no SSH key or tool on your computer.
- On the Cluster tab, select kube-rke-1 in the Nodes table. (Or open Servers and select it there.)
- At the top right of the server's page, press Open terminal.
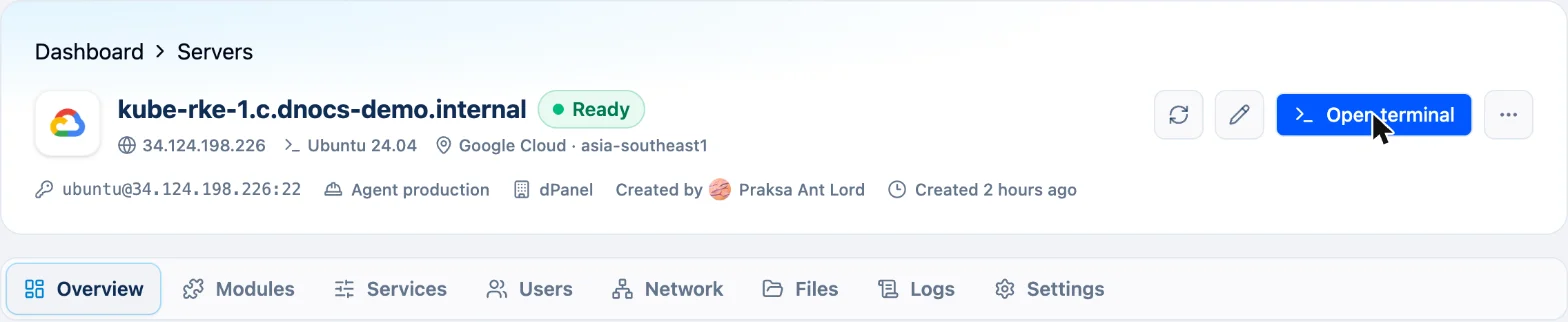
A terminal opens at the bottom of the page. RKE2 keeps kubectl and its kubeconfig in its own folders, so set them once per terminal:
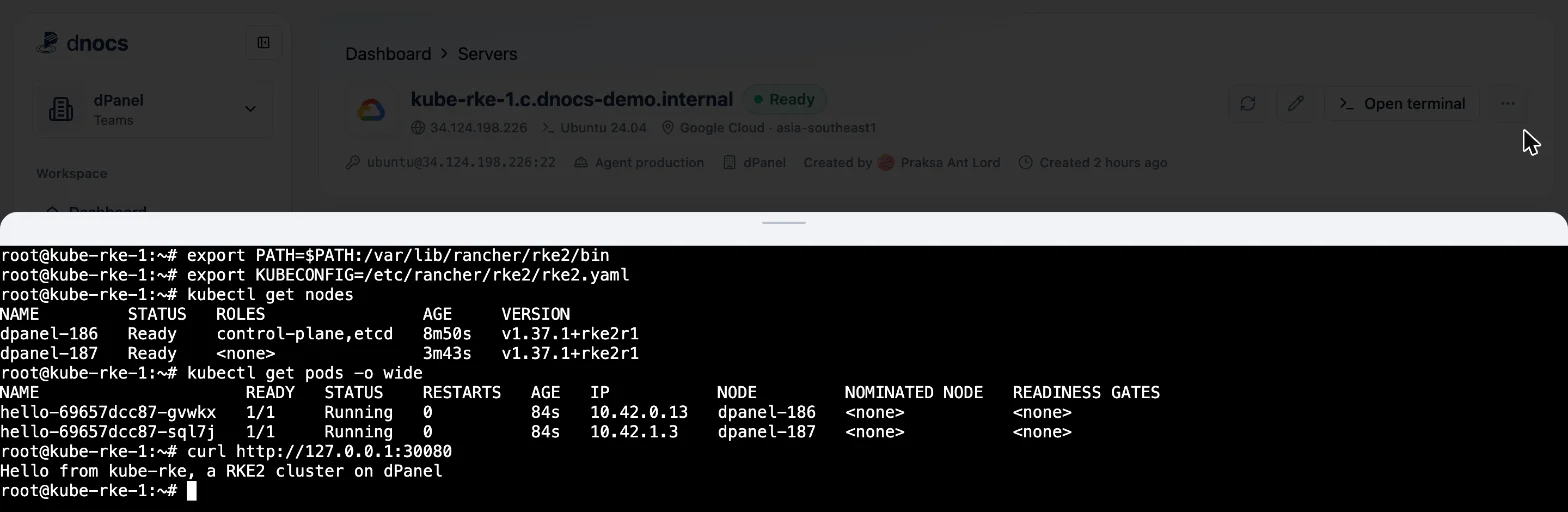
sudo -i
export PATH=$PATH:/var/lib/rancher/rke2/bin
export KUBECONFIG=/etc/rancher/rke2/rke2.yaml
kubectl get nodes
Both nodes read Ready. RKE2 names them after dPanel's server IDs, such as dpanel-186. The rest of this guide assumes that root shell.
7. Run your first app
In the same terminal, create hello.yaml: run nano hello.yaml, paste the text below, then press Ctrl+O, Enter and Ctrl+X. It runs two copies of a tiny web page and opens it on port 30080 of every node (a NodePort):
apiVersion: apps/v1
kind: Deployment
metadata:
  name: hello
spec:
  replicas: 2
  selector:
    matchLabels: { app: hello }
  template:
    metadata:
      labels: { app: hello }
    spec:
      containers:
        - name: hello
          image: hashicorp/http-echo:1.0
          args:
            [
              '-listen=:8080',
              '-text=Hello from kube-rke, a RKE2 cluster on dPanel',
            ]
          ports:
            - containerPort: 8080
---
apiVersion: v1
kind: Service
metadata:
  name: hello
spec:
  type: NodePort
  selector: { app: hello }
  ports:
    - { port: 80, targetPort: 8080, nodePort: 30080 }
Apply it and check it:
kubectl apply -f hello.yaml
kubectl get pods -o wide
curl http://127.0.0.1:30080
Kubernetes puts one copy on each node, and curl answers with the page:
8. Serve it on your domain with HTTPS
A dPanel load balancer on the Server node brings web traffic into the cluster:
- Open Load Balancers and press Create a load balancer.
- Gateway server: kube-rke-1. Web server engine: Caddy Server.
- Domain Name: Managed, Subdomain
kube-rke, and your domain. Keep HTTPS on. - Routing mode: L7. Routes: Type Proxy Pass, Matching Path
/*, address127.0.0.1and port30080. - Press Create load balancer.
On a fresh server the first load balancer also installs Caddy, which takes about 10 minutes; later ones take about a minute. When it reads Ready, open https://kube-rke.your-domain. The page reads Hello from kube-rke, a RKE2 cluster on dPanel, with a valid HTTPS certificate.
Uninstall, install again or delete
On the group's Cluster tab:
- Uninstall removes RKE2 from both nodes (it runs RKE2's own uninstall script). Apps in the cluster stop and their data on the nodes is removed. The servers and the group stay; the cluster reads Uninstalled.
- Install again shows when an install failed or after an uninstall. It installs on the same servers with the same roles and version.
- Delete cluster works on an uninstalled, failed or never-installed cluster. The group stays as a generic group; delete it to free the servers for another cluster.
This guide's cluster went through all three: it was first created from the command line, uninstalled, deleted with its group, and created again on the same two servers through the wizard above.
Delete the load balancer first if you made one for the cluster.
Not available yet
- Adding or removing nodes after the install, and upgrading the Kubernetes version.
- Downloading a kubeconfig for
kubectlon your own computer. Use Open terminal on the Server node for now. - Opening the cluster ports in the dPanel firewall automatically; that is why nodes need the firewall off.
Troubleshooting
| What you see | Fix |
|---|---|
| RKE2 is greyed out | One of the servers is 32-bit ARM (armhf). Use k3s there. |
| A server can't be picked: Already in a group | Remove it from its group first, or pick another server. |
| Creating fails: the server already runs Docker, k3s or RKE2 | Use a fresh server, or uninstall that software first. If you removed it by hand, press Refresh inventory on the server's Modules tab so dPanel sees it is gone. |
| The status reads Failed | Open the last execution from the Cluster tab to read the error, fix it, then press Install again. |
kubectl: command not found | Run the sudo -i and two export lines from step 6 in that terminal first. |
| The domain doesn't answer | Check curl http://127.0.0.1:30080 on kube-rke-1 first, then the load balancer's status and Logs. |
From the terminal
The same cluster can be created with the dnocs CLI, using the server IDs from dnocs server list:
dnocs cluster create --name kube-rke --engine rke2 --server <ID of the Server node> --agent <ID of the Agent node>
dnocs cluster detail --id <cluster ID>
dnocs cluster install installs again after a failure, and dnocs cluster uninstall and dnocs cluster delete remove it. See AI in the terminal to install dnocs.
Frequently asked questions
How long does the install take?
About 12 minutes for two servers. You can close the wizard; the install keeps running and the Cluster tab shows its progress.
Can I add a node to the cluster later?
Not yet. The servers and their roles are fixed when you create the cluster. To change them, uninstall and delete the cluster, then create a new one.
How do I use kubectl from my own computer?
Downloading a kubeconfig is not available yet. Use Open terminal on the Server node and run kubectl there after the sudo -i and export lines from step 6.
The install failed. What now?
Open the last execution from the Cluster tab to read the error, fix the cause, then press Install again. It uses the same servers, roles, engine and version.